Creating a home media server can be a rewarding experience, as it allows you to consolidate and stream your DVD and Blu-Ray collection to various devices in your home. In this guide, we will walk you through the process of setting up a home media server using Plex Media Server, MakeMKV for ripping DVDs and Blu-Rays, and MeGUI for encoding the rips. By following these steps, you'll have a fully functional media server up and running in no time.
Step 1: Install Plex Media Server
To begin, you'll need to download and install the Plex Media Server software on a compatible computer, NAS device, or dedicated server. Plex is available for Windows, macOS, Linux, and many NAS devices. Visit the Plex website (https://www.plex.tv/media-server-downloads/) to download the appropriate version for your platform. Once downloaded, follow the installation prompts to complete the setup. Installation is straightforward and requires no special configuration. After installation, launch Plex and sign in or create a new account if you don't have one.
Step 2: Organize your media files
Before you start ripping and encoding your DVDs and Blu-Rays, it's essential to create a folder structure to organize your media files. This will make it easier for Plex to recognize and categorize your media library. Create a separate folder for each type of media (e.g., Movies, TV Shows, and Music) and then subfolders for individual movies or TV show seasons. The folowing link explains how to structure your folders.
https://support.plex.tv/articles/naming-and-organizing-your-movie-media-files/
Step 3: Rip DVDs and Blu-Rays using MakeMKV
MakeMKV is a powerful tool for Windows, MacOS, and Linux that allows you to rip the content from your DVDs and Blu-Rays into a digital format. Download and install MakeMKV (https://www.makemkv.com/download/) on your computer. Insert your DVD or Blu-Ray into your computer's disc drive and launch MakeMKV. The software will automatically recognize the disc and display its contents. Select the titles you want to rip and choose the output folder you created earlier. Click the "Make MKV" button to start the ripping process. Repeat this process for each of your DVDs and Blu-Rays. MakeMKV is techincally not distributed under a free software license, but it's available for free while in Beta. However, it's been in Beta for something like 14 years now, so it's probably going to remain free for the foreseeable future.

Step 4: Encode rips using MeGUI
Now that you've ripped your media files, it's time to encode them to a more efficient format using MeGUI. Download and install MeGUI (https://sourceforge.net/projects/megui/files/) on your computer. MeGUI is available in 32 and 64-bit versions, but unfortunately for Windows only. The "Test" branch is the 64-bit version. If you're on another platform, Handbrake (https://handbrake.fr/) is a fairly decent option, although it lacks many of the fine-grain controls of MeGUI and the output tends to be lower quality. You're on your own from here if you go with Handbrake.
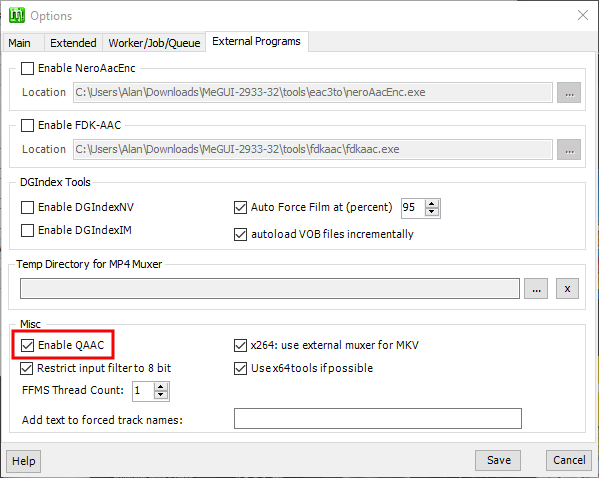
Launch MeGUI and click "Options" to configure the software to your preference. One option you will probably want to enable is QAAC, which is widely regarded as the highest quality AAC audio encoder available. You'll want this for your audio. The rest can be left alone if you're unsure.
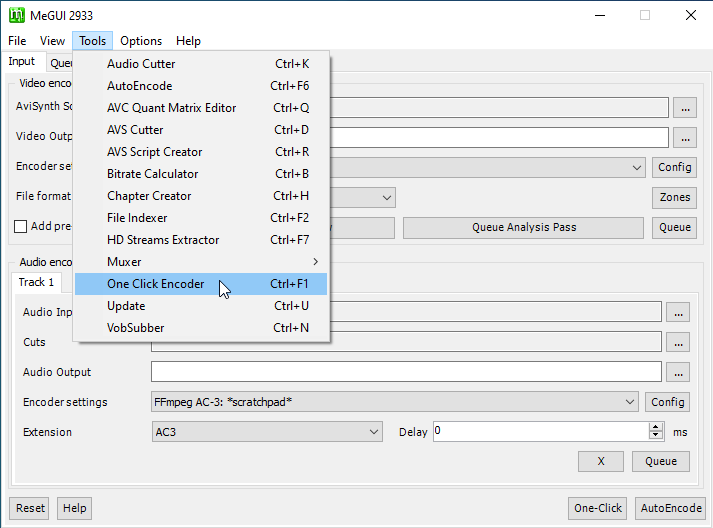
Next, you'll configure a "One Click Encode" profile to use for your media. This is very specific to your media in terms of aspect ratio, cropping and resizing, and other considerations, but we'll assume for this example you are just ripping a standard Blu-ray movie and don't want anything special.
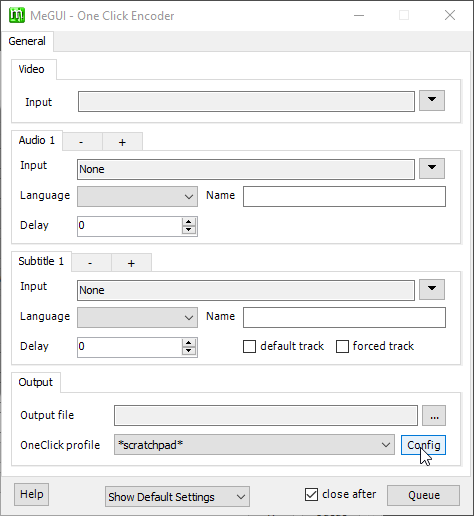
Now we'll configure a profile.
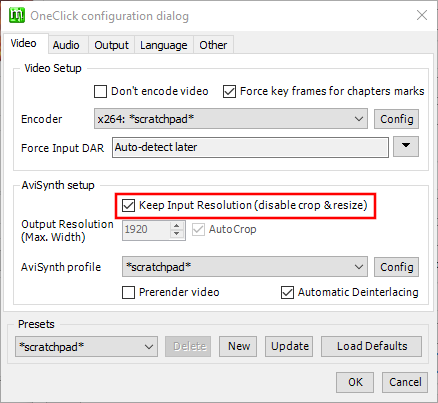
First up is the video configuration. You'll have several options here, but if you're unsure, x264 with quality 20 and preset "Very Slow" is a good place to start. That should give you video that's indistinguishable from the original to the naked eye. If quality isn't that important to you, you can take the quality up to 23 or so and get a smaller file. (Higher setting is lower quality here.) I wouldn't go much above 23 because the result will probably start looking blocky after that.

Next, set the crop and resize options to get rid of any black borders in the video, which is purely a matter of personal preference. For this example, we will disable cropping and resizing for simplicity. Experiment with this to find your preference.
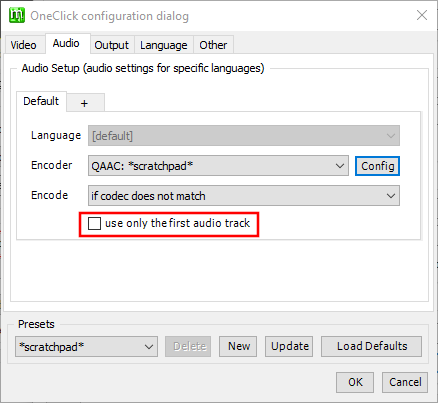
Now we set the audio preferences. Again, you'll have plenty of options here depending on your preferences, but for simplicity we will go with QAAC that you enabled in settings. There's no sense in re-encoding audio that's already AAC, so we will encode only if the audio codec doesn't already match our preference. We also want to keep all audio tracks to be sure we get any commentary or isolated score tracks, so disable the "use only first track" option. If you want to configure the QAAC options further you can, but the default settings of VBR 91 should work fine for most use cases. If you do want to tinker, quality settings here are the opposite of video quality. (i.e., 100 is higher quality than 91.) Remember that higher quality means bigger files.
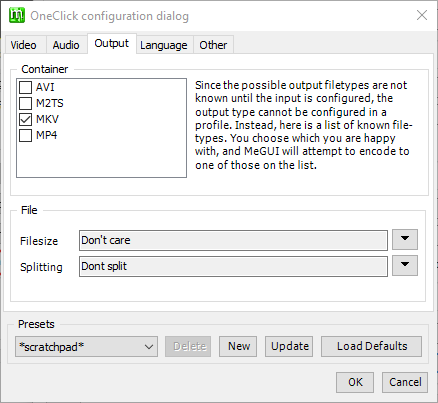
For output, we'll use MKV, which is the most flexible container format available and is capable of retaining subtitles, chapters, and other metadata information from your disc. Some devices may have difficulty with MKV, but Plex will handle it just fine. If you think you may want to use your files on another type of device - particularly Apple - use MP4 instead. You may lose a few features, but compatibility will be better.
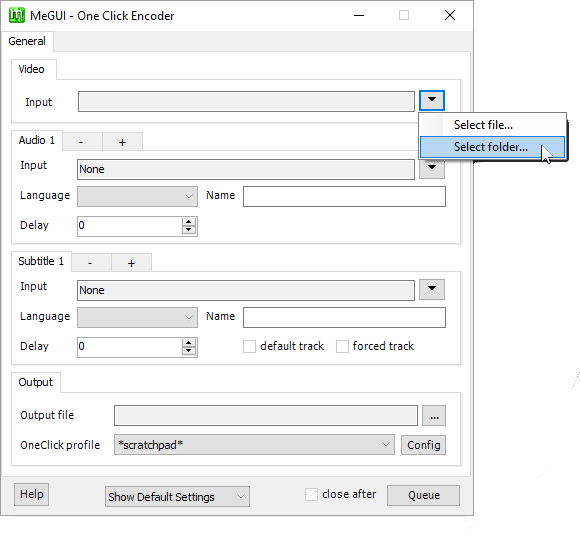
That's pretty much all the configuration you'll need to create great quality rips for your media server. You can tinker with other settings if you know what you're doing, but these settings should be good for most people in most cases. Just save everything and give your profile a name like "Blu-ray basic". Then point One Click Encoder to the directory containing the files you ripped and grab a cup of tea, because it will take a while.
Wait for your files to finish encoding, and when it's done you should have files that are more or less visually and aurally indistinguishable from the originals at a fraction of the size.
Step 5: Add encoded files to Plex
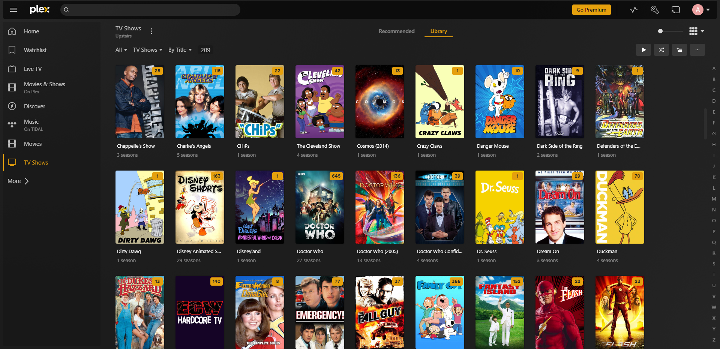
Once you've encoded all of your media files, it's time to add them to Plex. In the Plex Media Server interface, click the "+" icon next to "Libraries" to create a new library. Choose the appropriate library type (e.g., Movies, TV Shows, or Music) and specify the folder containing your encoded files. Plex will automatically scan the folder and add your media files to your library.
Step 6: Stream your media
Your home media server is now ready to go! You can access your Plex library from any device with the Plex app installed or through a web browser. Enjoy streaming your favorite movies and TV shows to your devices throughout your home.
If you have additional suggesions or questions, drop us a comment below.