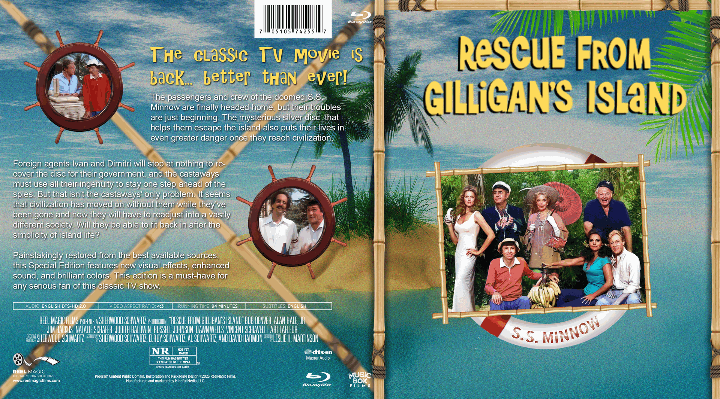
"Rescue from Gilligan's Island," the 1978 made-for-television film, brought the beloved characters of the 1960s sitcom back to life after over a decade. However, as with many films of its era, the movie has faced the test of time, with its film prints suffering severe deterioration, damage, and destruction and the original graphical elements being lost. Moreover, the film has fallen into the public domain, meaning that no one has been willing to put the time and effort into restoring something that anyone can copy and sell - until now. This article explores the process of restoring this classic film and the technical challenges involved in preserving its legacy for future generations.
The Source Material
There have been a few DVD releases of the film over the years, each offering its own assortment of horrendous quality problems. Unfortunately, although shot on 16mm film like most 1970s television, the whereabouts of the camera negative or any surviving film prints are unknown and the only available sources for the movie reside on videotape. It's possible that a film print is lying in the back of the vault at some studio archive, but it's unlikely that we will ever know. [edit 8/8/25: a print has actually turned up!] Inquiries to Warner Brothers (the current rights holder to the TV series) and Universal (the rights holder to the other Gilligan TV movies) have either gone unanswered or been meet with a terse reply to go away. Therefore, we are stuck working from a Betamax videotape source, which is far from ideal and creates a whole set of problems of its own. Fortunately, there are different video sources available that were originally made from at least two different film prints, each with its own telltale quirks and characteristics. That gives us some options when the time comes to patch defects.
One central problem with working from videotape is the frame rate. Film runs at 24 progressive frames per second, while an NTSC standard television displays images at 30 interlaced frames per second. To solve this problem, the NTSC video standard uses a process known as a 3:2 pulldown to change the frame rate for television broadcast. 3:2 pulldown simply means that each group of four frames is field separated and then selectively duplicated to produce 10 fields, which results in a conversion from 24fps to 60fps. Then the separated fields are interleaved back together to halve the frame rate and create 30 interlaced frames. Because of the particular formula used in the conversion, the resulting output is a pattern of three progressive frames followed by two interlaced frames with combing. That means that 2/5 of the frames will be interlaced. It sounds complicated, but this diagram from Wikipedia demonstrates the process.
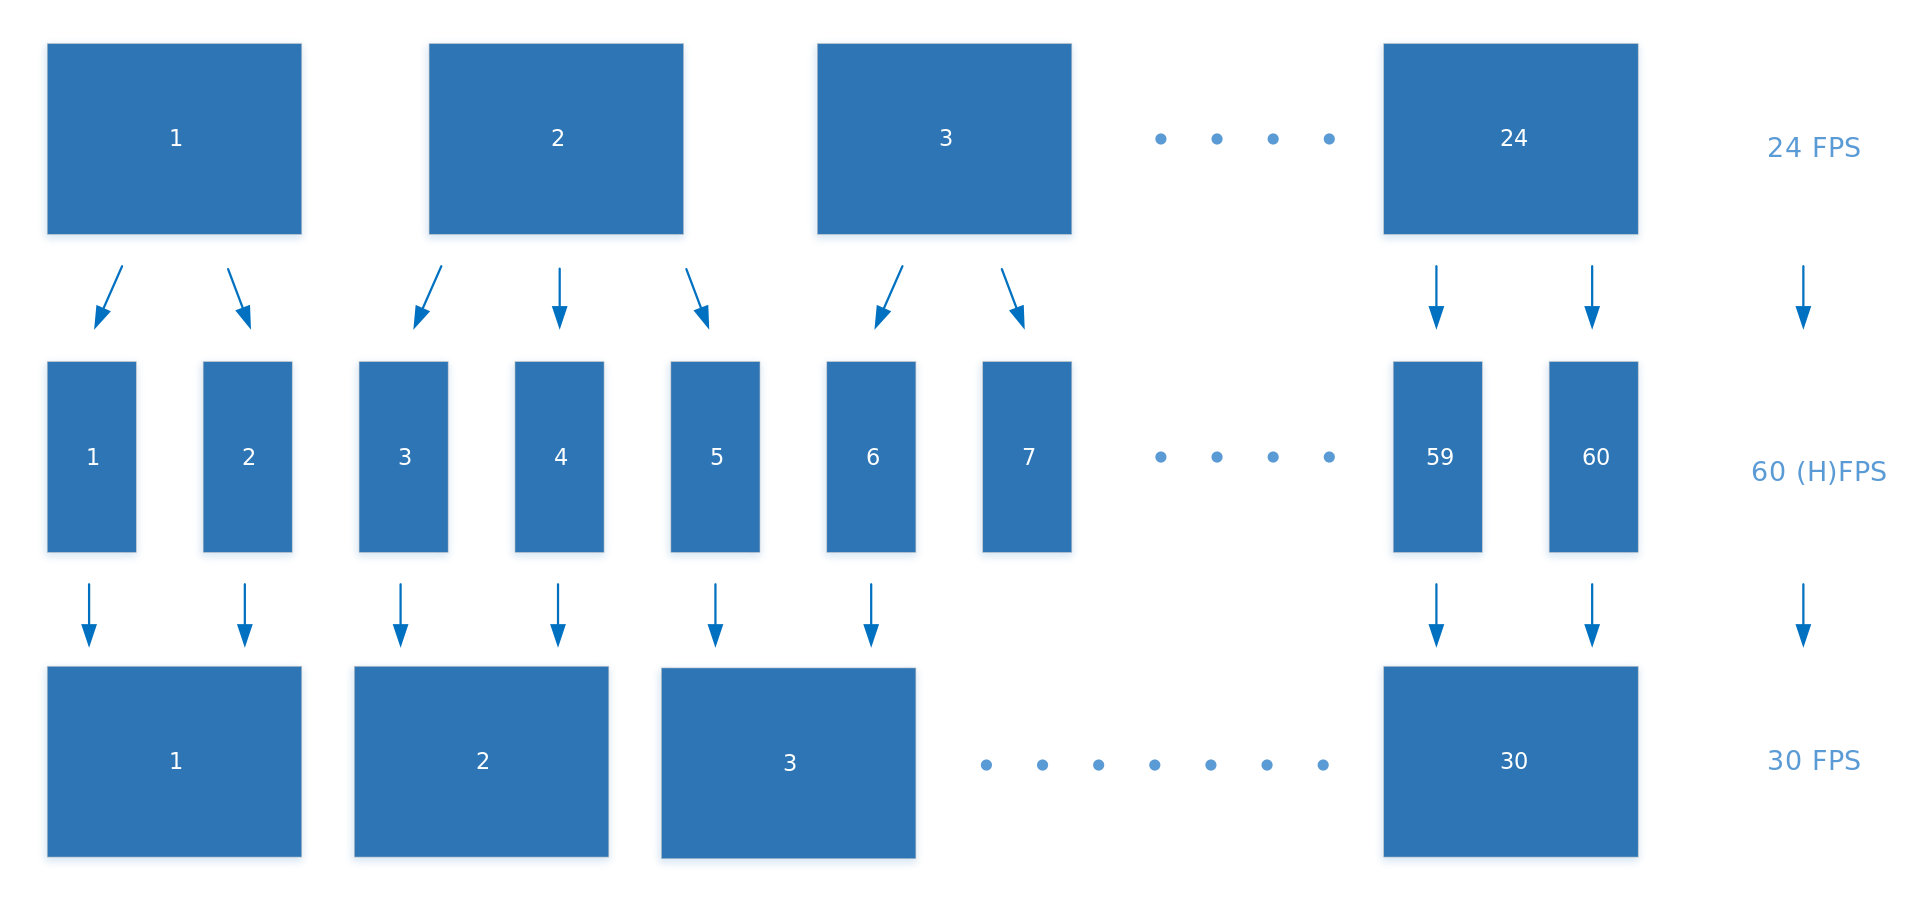
This creates our first problem in that we needed to restore the original progressive 24 fps from this 30fps video. Normally, if we had access to a high quality master tape, we would use a routine process known as inverse telecine (IVTC) to simply reverse the 3:2 pulldown process and leave the original frames. However, in this case, all the available sources are copies of various generations that are either too poor to accurately detect combing, or the interlaced fields have already been blended (more info about blending can be found here), which cannot be undone by conventional means. Fortunately, there are still things that can be done. The blended frames generally follow a predictable pattern, so it's possible to selectively "unpick" the blended frames and use sophisticated interpolation software to create new, clean frames to replace them and then decimate it back to its original 24 frames per second. It's not a perfect process and requires some manual cleanup, but the result is a relatively clean output that approximates the original frames as closely as we are going to get.
Next, we used digital noise reduction to clean up a lot of the dirt and scratches that were on the surface of the film print when it was scanned. But we did it with a twist, though. We used our own proprietary technique known as "superscaling" (not to be confused with the Davinci Resolve function of the same name) to scale the video all the way up to 8k with AVISynth's nnedi3_rpow function before denoising. Videotape has inherently low resolution, and so therefore we are "image poor" right out of the gate when working with video. When the video is upscaled, new image information is interpolated from the existing data and when the video is downscaled it creates the illusion of sharper resolution and more detail.
While the video is upscaled, a light pass with DeSpot and RemoveDirt cleans up a lot of the noise without being too destructive on the image. Stronger settings will remove more blemishes but will also remove image detail, so it's generally better to go light and then manually paint out any remaining defects. Once the video is satisfactorily denoised, it's scaled back down to 1080p for the remainder of the work because working in 8k is prohibitively time-consuming. Resolve's DustBuster tool is ideal for manual cleanup, but it requires that each of the film's 134,000 frames be examined one by one - a very tedious and time-consuming process. Using Resolve, our team manually painted out over 10,000 major and minor defects in the frames.
The images below show two raw sample frames before and after the denoising process. The process has changed the colors slightly, but this is easily fixed in the color grade later. Look at the crispness and level of detail, particularly in the faces, where video head noise has been removed and replaced with some degree of finer detail. The cleaned-up frames looks perhaps a little oversmoothed to the naked eye, but in actuality the process has only revealed what was underneath the head noise. It simply exposed that there was never any significant detail there to begin with. We can hide this to some extent later by adding some organic-looking 16mm film grain over the top during the color grade.


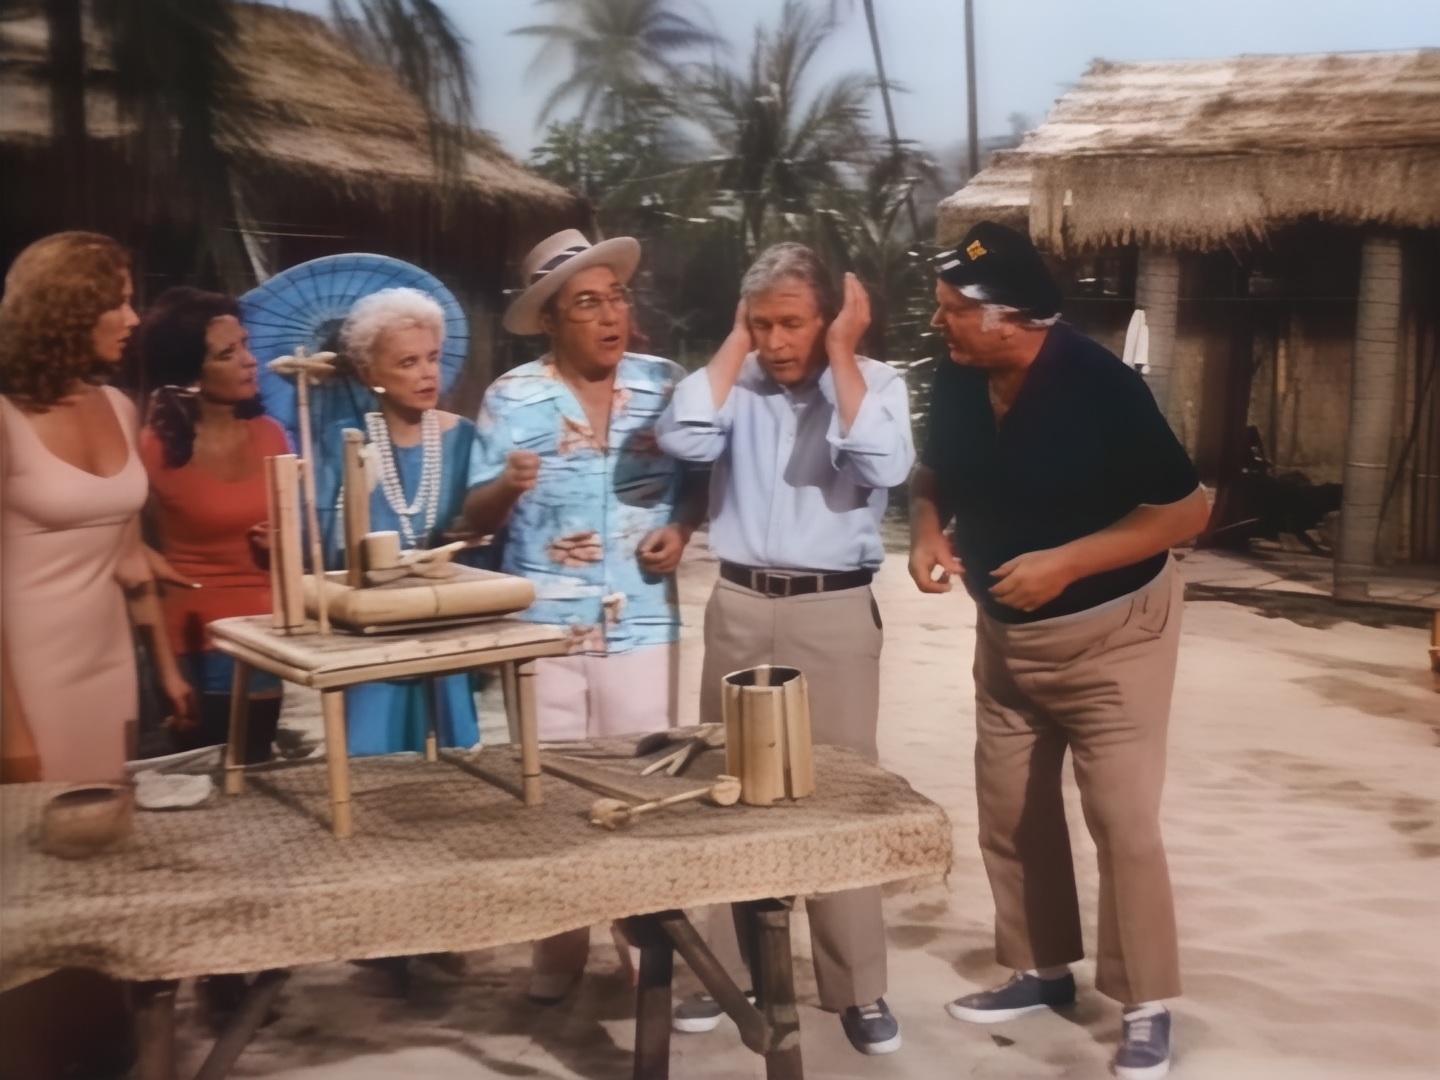
Using Resolve and Photoshop, we also cleaned up some severe chroma bleeding at the scene cuts which affected approximately 60% of the cuts in the film. Chroma bleeding causes the color from the last frame in the cut to "bleed over" into an adjacent frame of another scene, and it's a hallmark of videotape sources. A common way to deal with this is to simply cut out the bad frames, but this approach has problems. If there is music or dialogue over the scene cut, removing even just one or two frames can sometimes create a noticable stutter in the audio. Moreover, since 24 frames equals one second of video, the cumulative effect of removing frames at hundreds of cut points can add up to a significant amout of time that affects the running time of the film. Therefore, we chose a more non-destructive approach. Wherever posible, we used Photoshop to create new composite frames at the cut points from the surrounding good frames. When that wasn't possible, we used a technique of selectively duplicating frames at the cut points to replace damaged frames. We care fully selected frames that showed the least amount of motion for duplication. The human eye can't typically perceive just a single duplicated frame, particularly in low-motion scenes, without concerted effort, and so this worked pretty well. Some action scenes, like the tractor chase, proved more challenging, but the results were satisfactory.

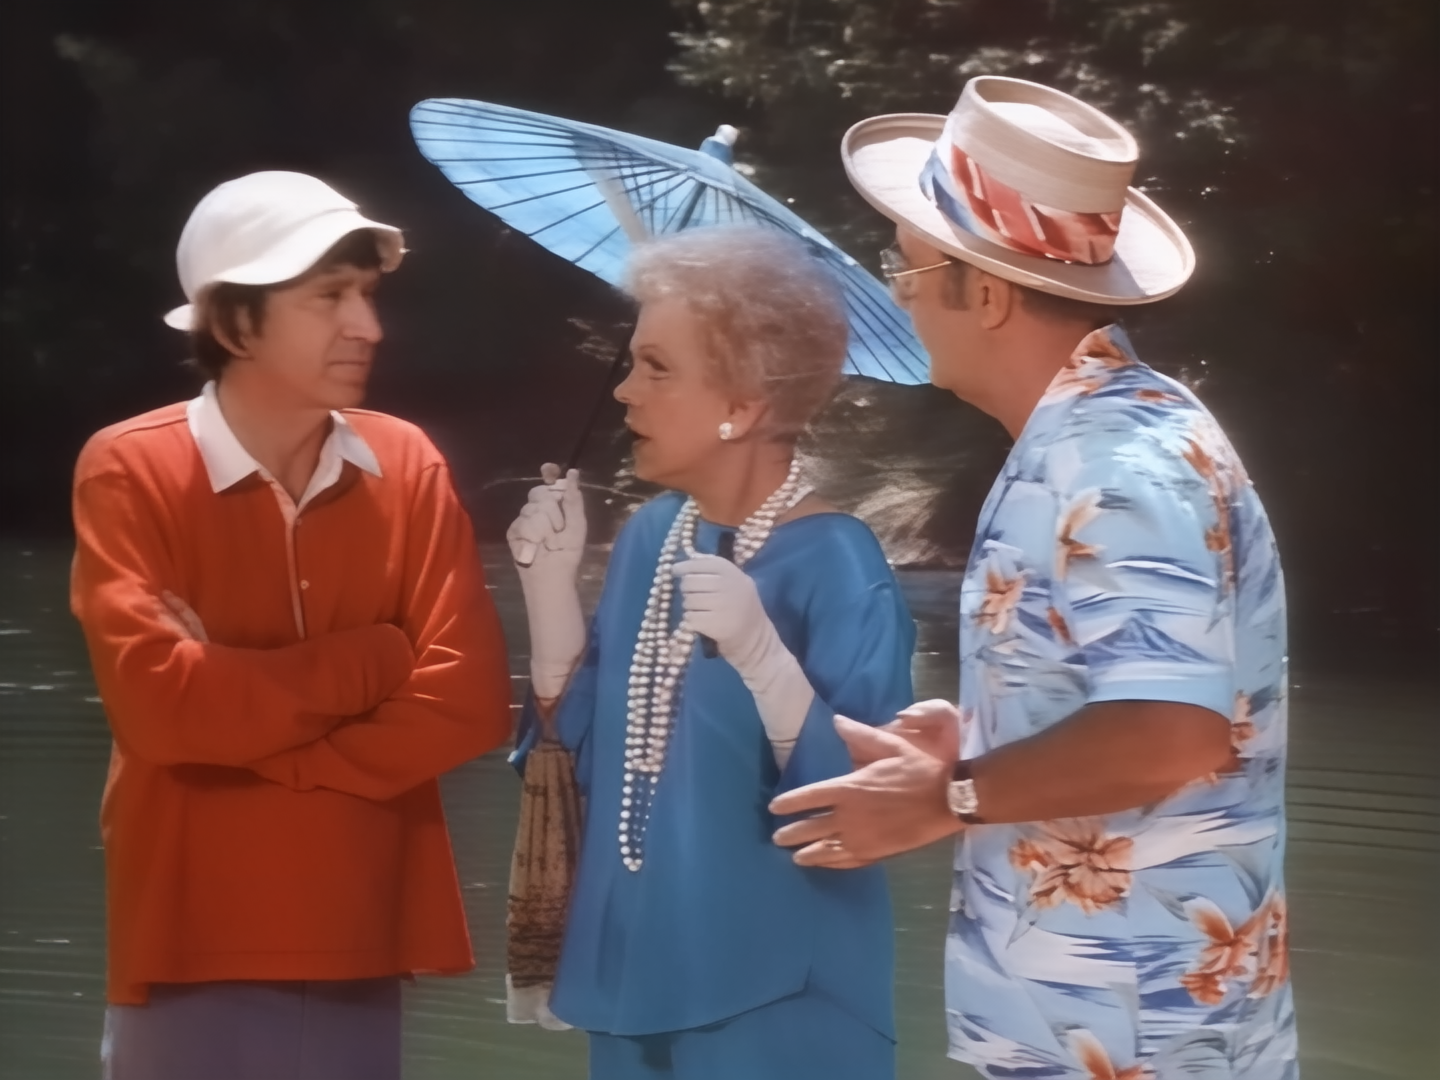
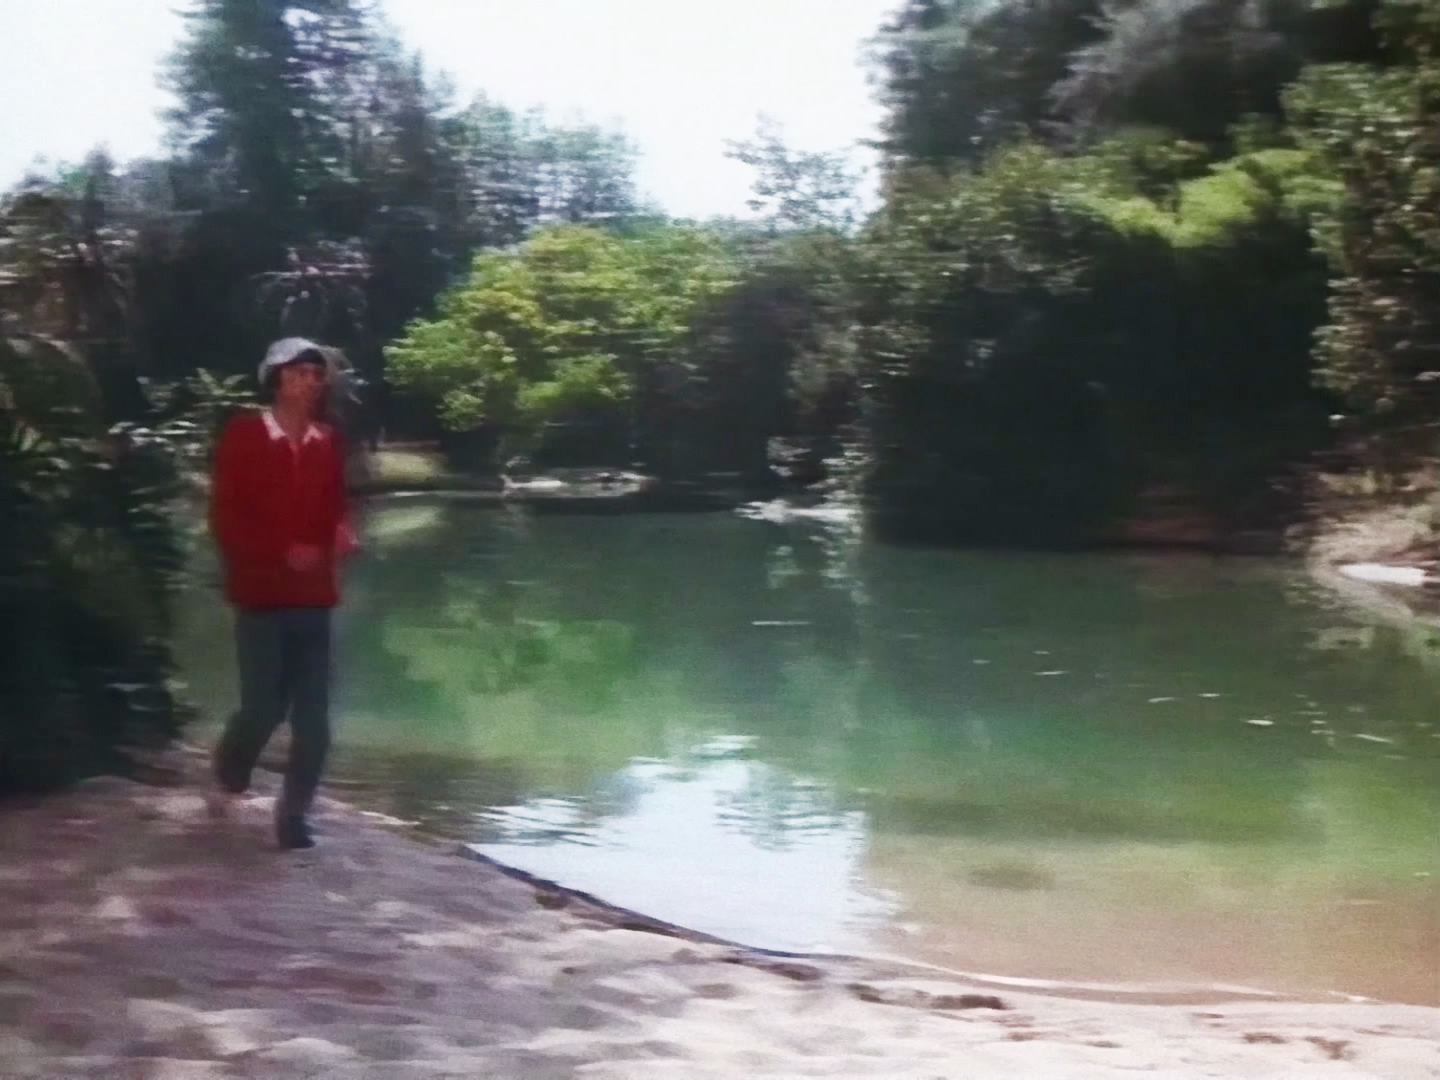
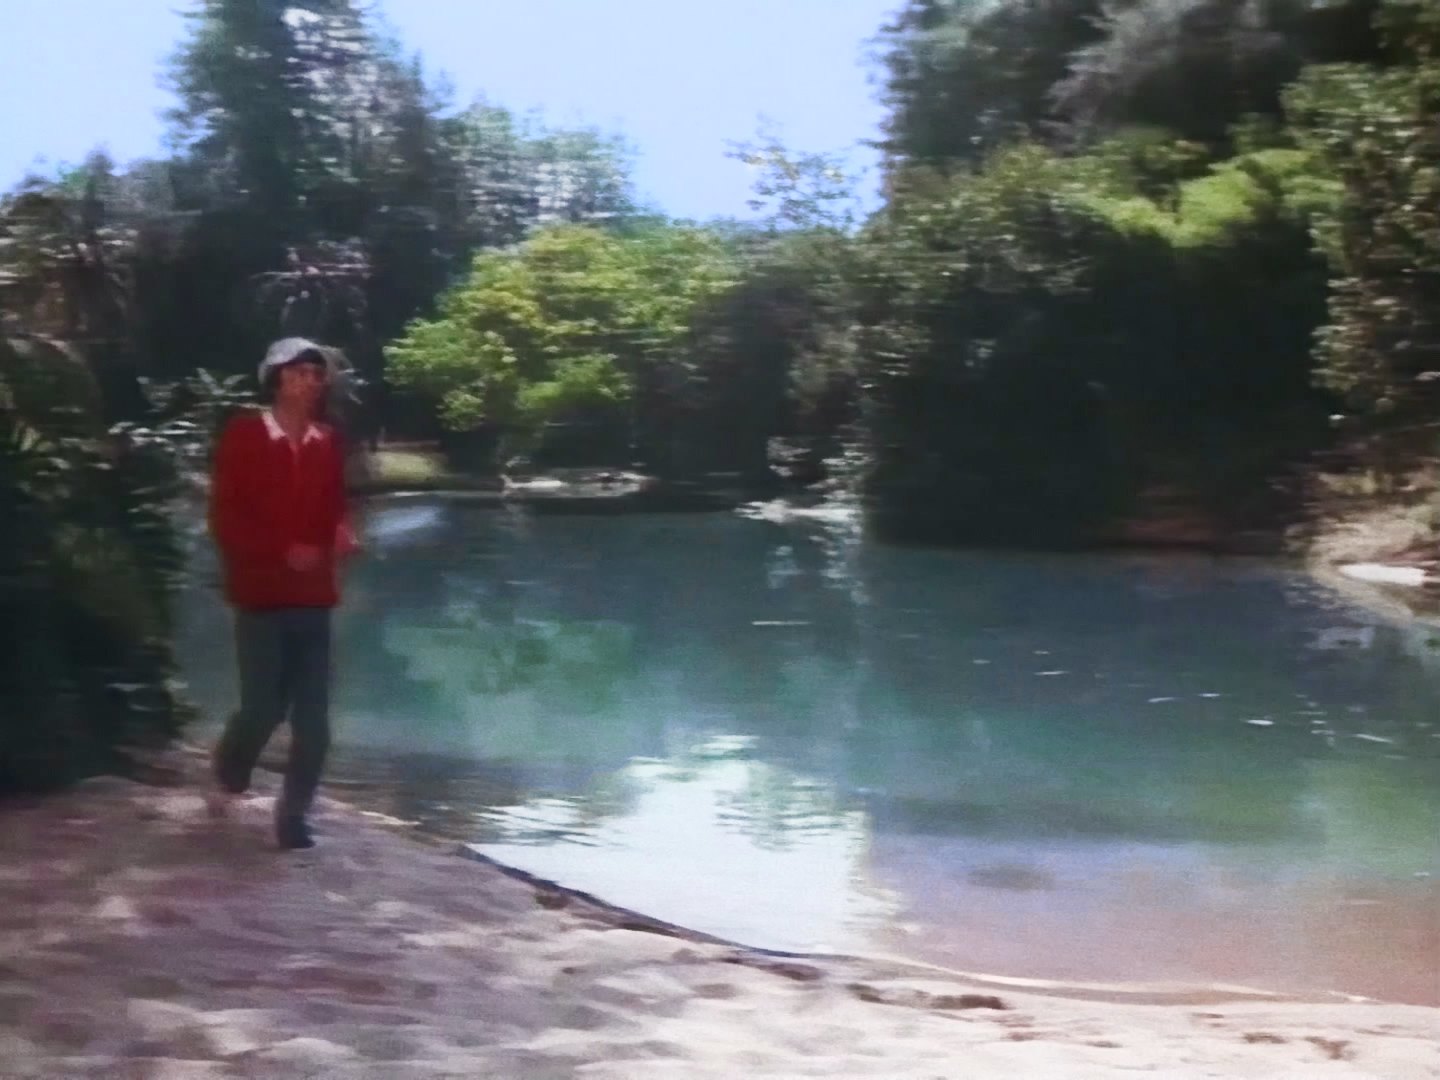
The image showed a lot of instability caused primarily by the gate weave of the film being run through the scanner, as well as some warping that was probably caused by bad splicing of the print. These issues were much more pronounced in the latter part of the film, especially the scenes of the Professor's lab and the Howell dinner party. There were also a handful of instances where the camera operator made a sudden jerk to the right or left as if suddenly realizing the shot was framed wrong and making a correction. After some discussion about how true to broadcast we wanted to stay, we decided to remove these movements because they would be distracting to a viewer watching on modern equipment. Even though the movement was there during the original broadcast, it would probably be seen today as a defect that we failed to fix. To fix these stability issues, all of the shots that were supposed to represent a fixed camera position were stabilized in Fusion using motion trackers followed by a transform node. For scenes with camera motion, we used After Effects' Warp Stabilizer tool at a low position-only setting of about 1% to smooth the camera motion.

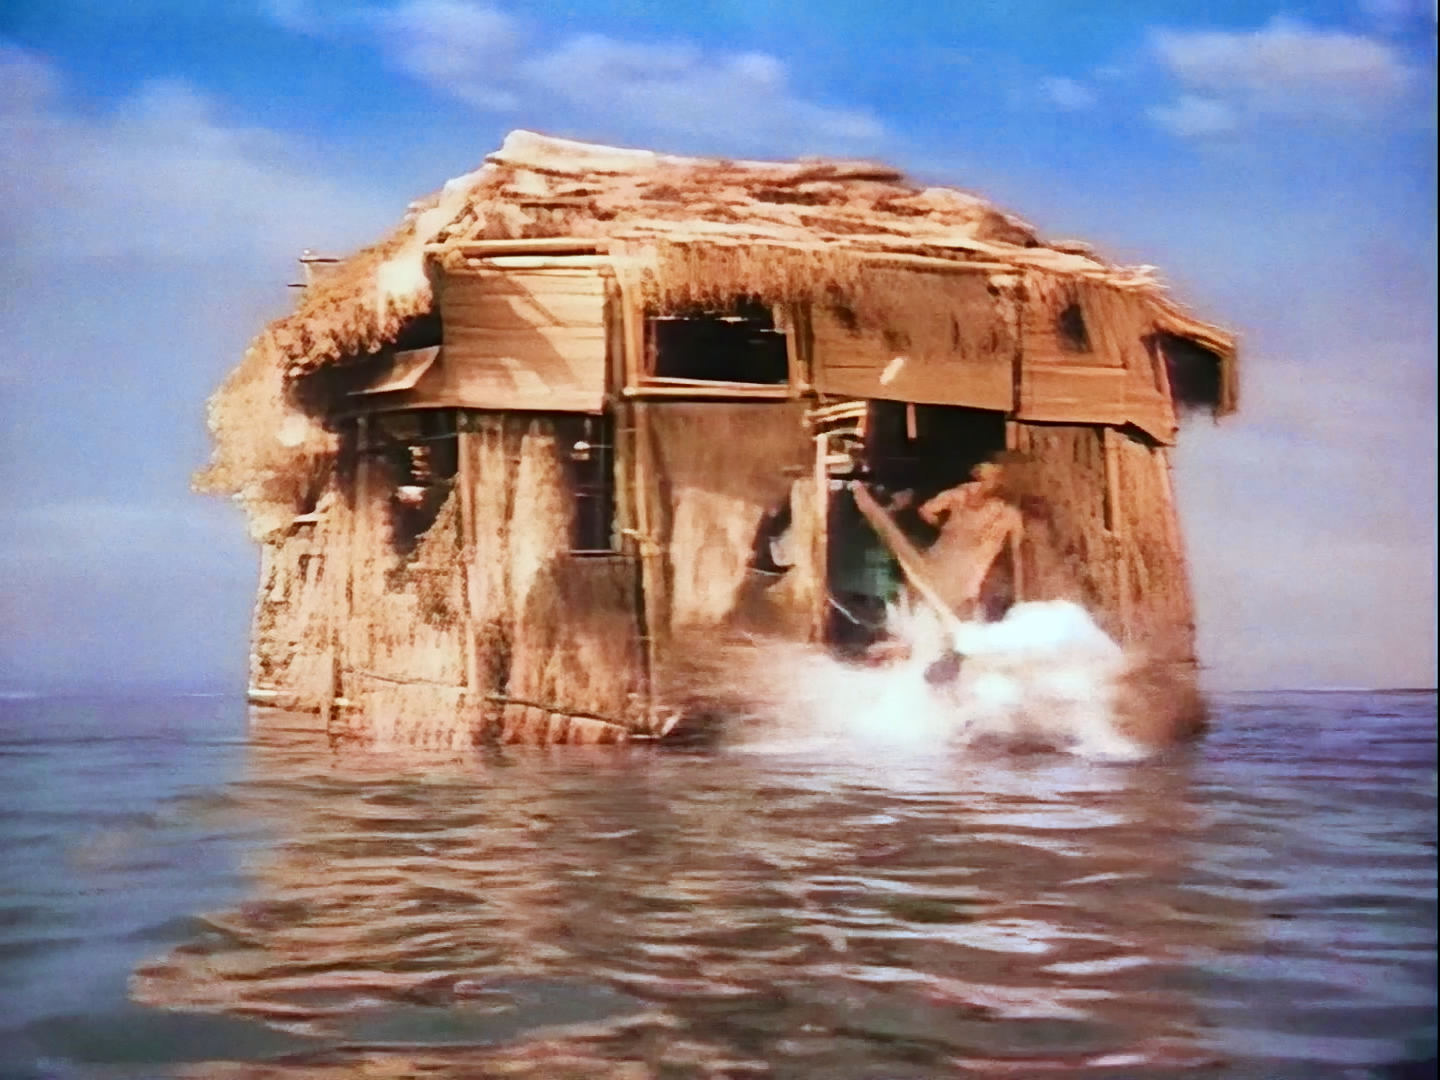
Once the primary source was repaired, there were a series of patches that had to be applied from different sources. The Christmas party scene on the Minnow II, for instance, was missing from all of the better quality sources and had to be patched in from an older, lower quality source. The patches all received the same treatment as the main film, and a combination of sharpening and AI upscaling helped mask the quality difference between the sources, although it's still quite noticeable. We were able to match the colors between sources surprisingly well in Resolve's color page and then give the whole thing a consistent color grade to bring down the black level in the darker areas and make the whites and skin tones look more natural throughout. We also took the liberty in the color phase of making the sky bluer in several scenes that were clearly overcast on shooting day but were intended to be sunny, as well as bluing up the "ocean" and lagoon water a little bit so it's not so noticeable that it's actually just nasty green and brown water in a tank.

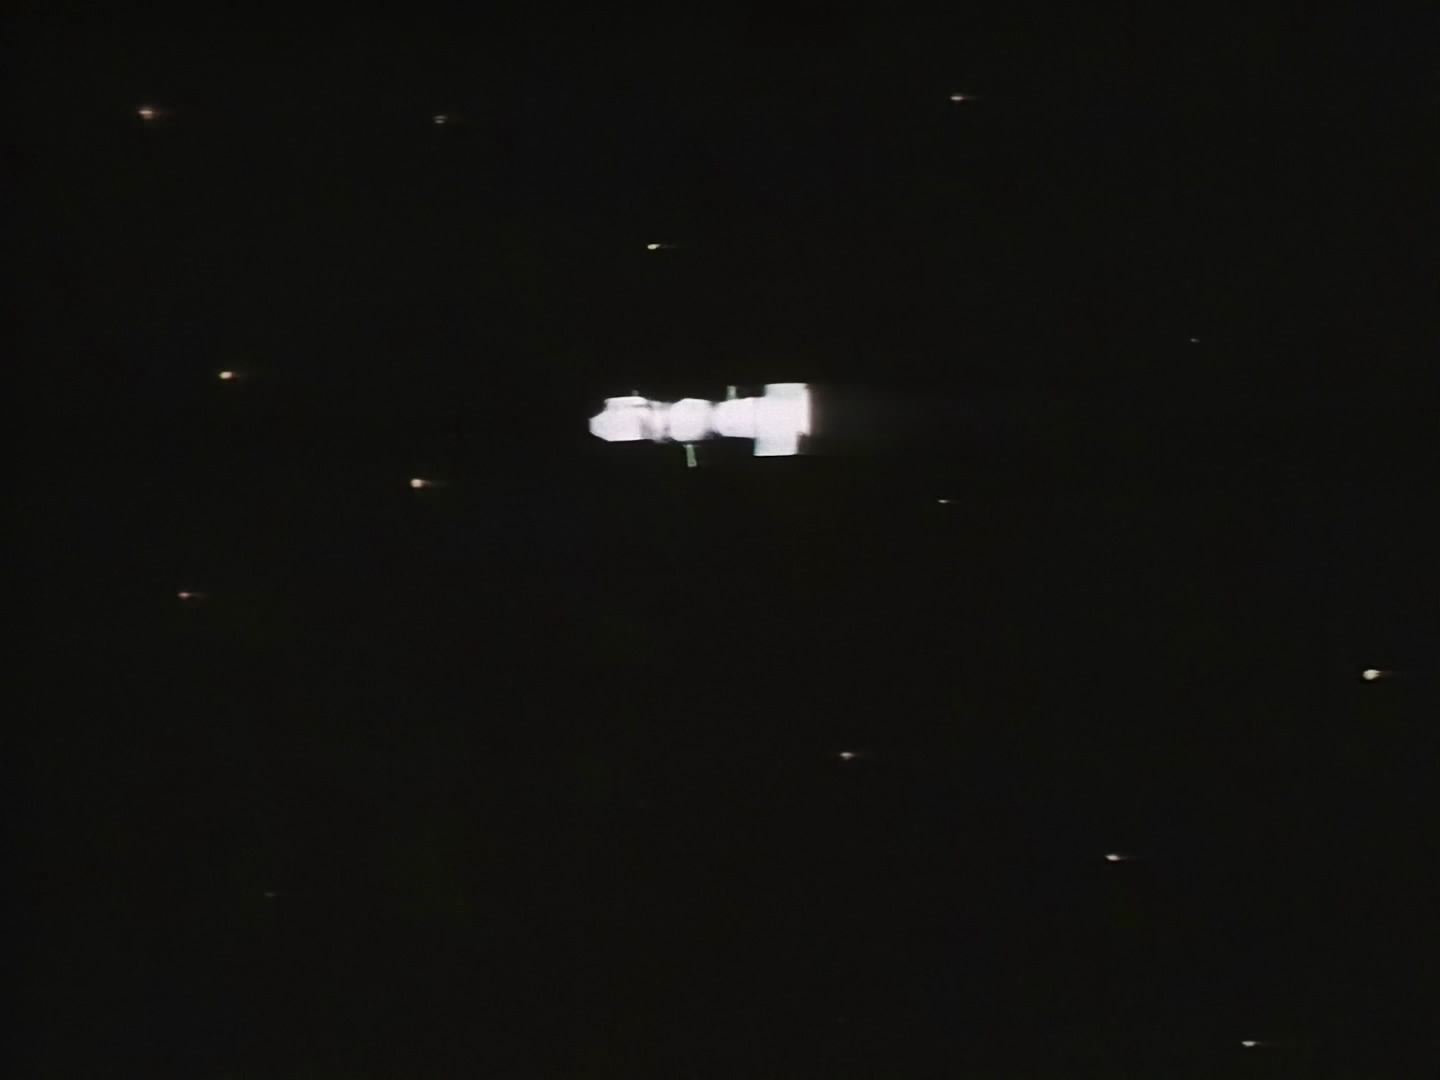
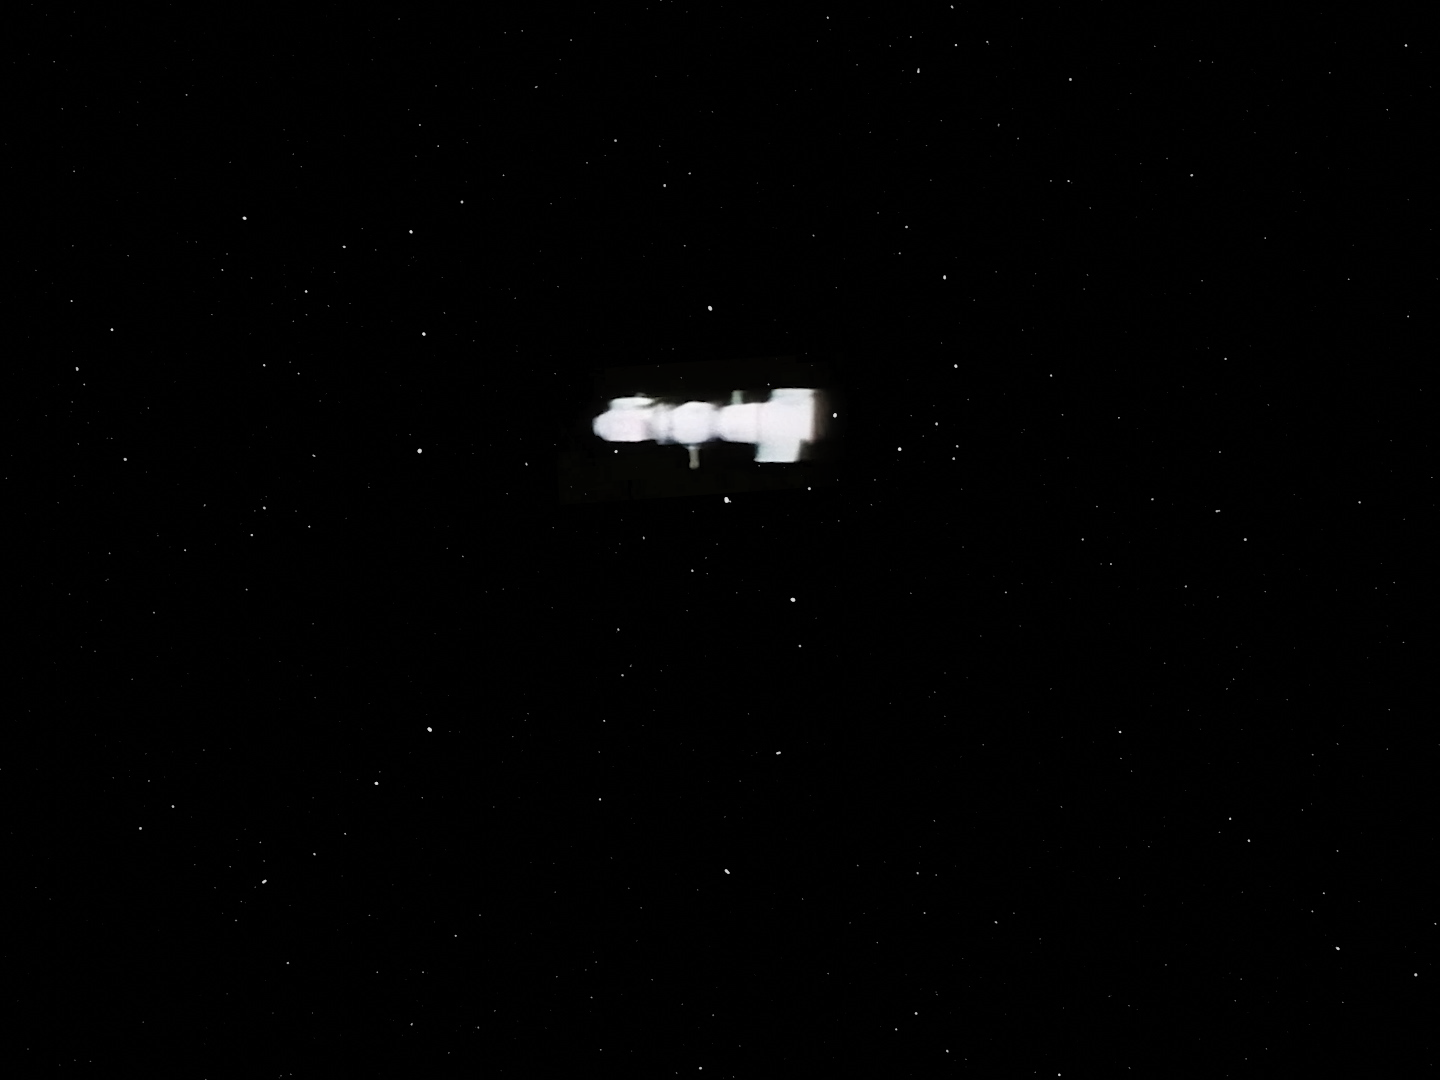
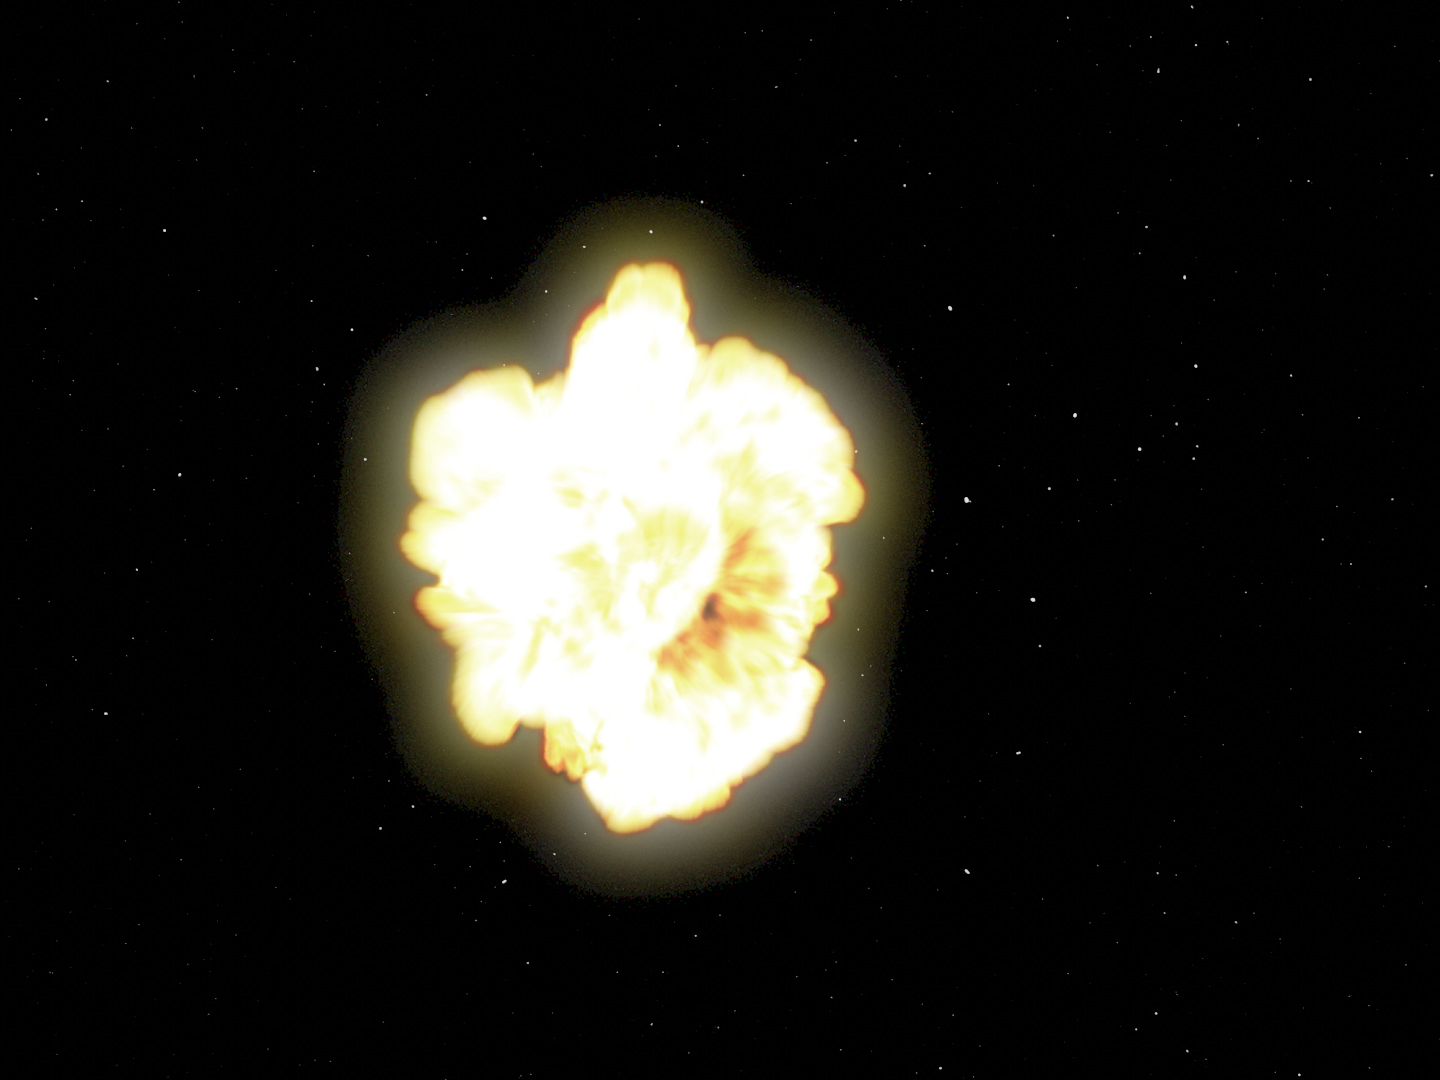
Setting aside the quality issues of the video itself, there were several effects shots in the movie that were really quite substandard, even by 1970s television standards. We felt that the shots of the Russian satellite in space and the data disc falling to Earth were of such poor quality that they really detracted from the viewing experience and needed to be improved for modern audiences. We created new 3D models in Blender and replaced the offending shots with new CGI. We tried to keep the new shots consistent with the era and style of the original so that they will blend in seamlessly. In other words, they should look just a little bit cheesy to blend in. It's not supposed to look like Star Wars; if the shots are too sophisticated, they will be as much of a distraction as the original bad ones.

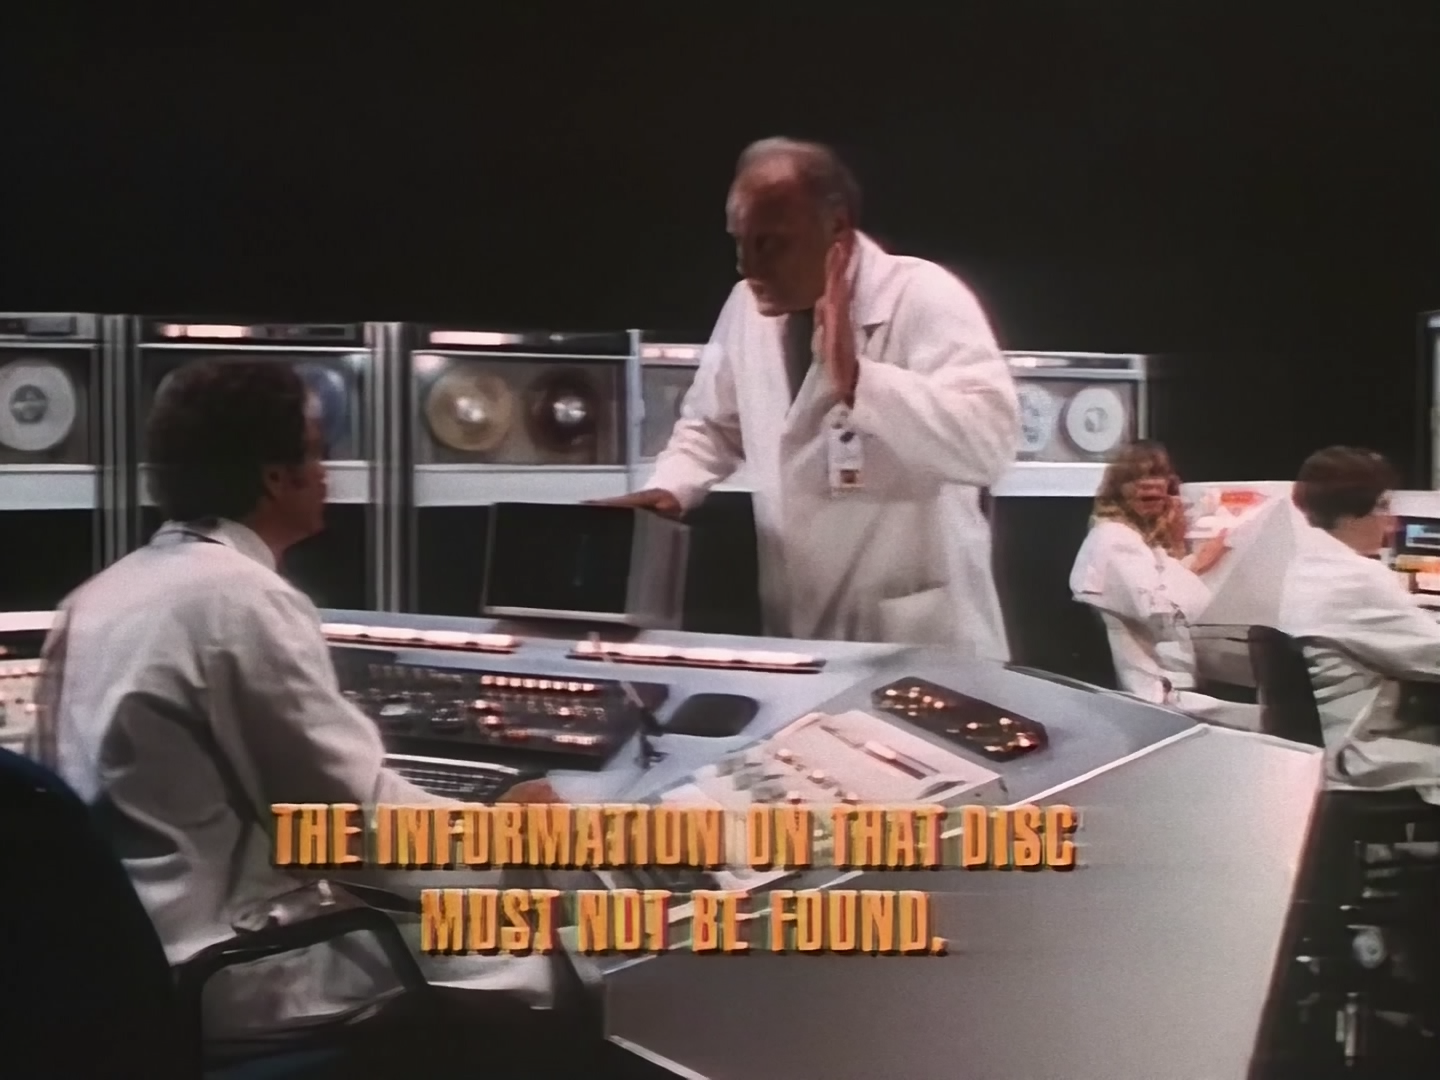
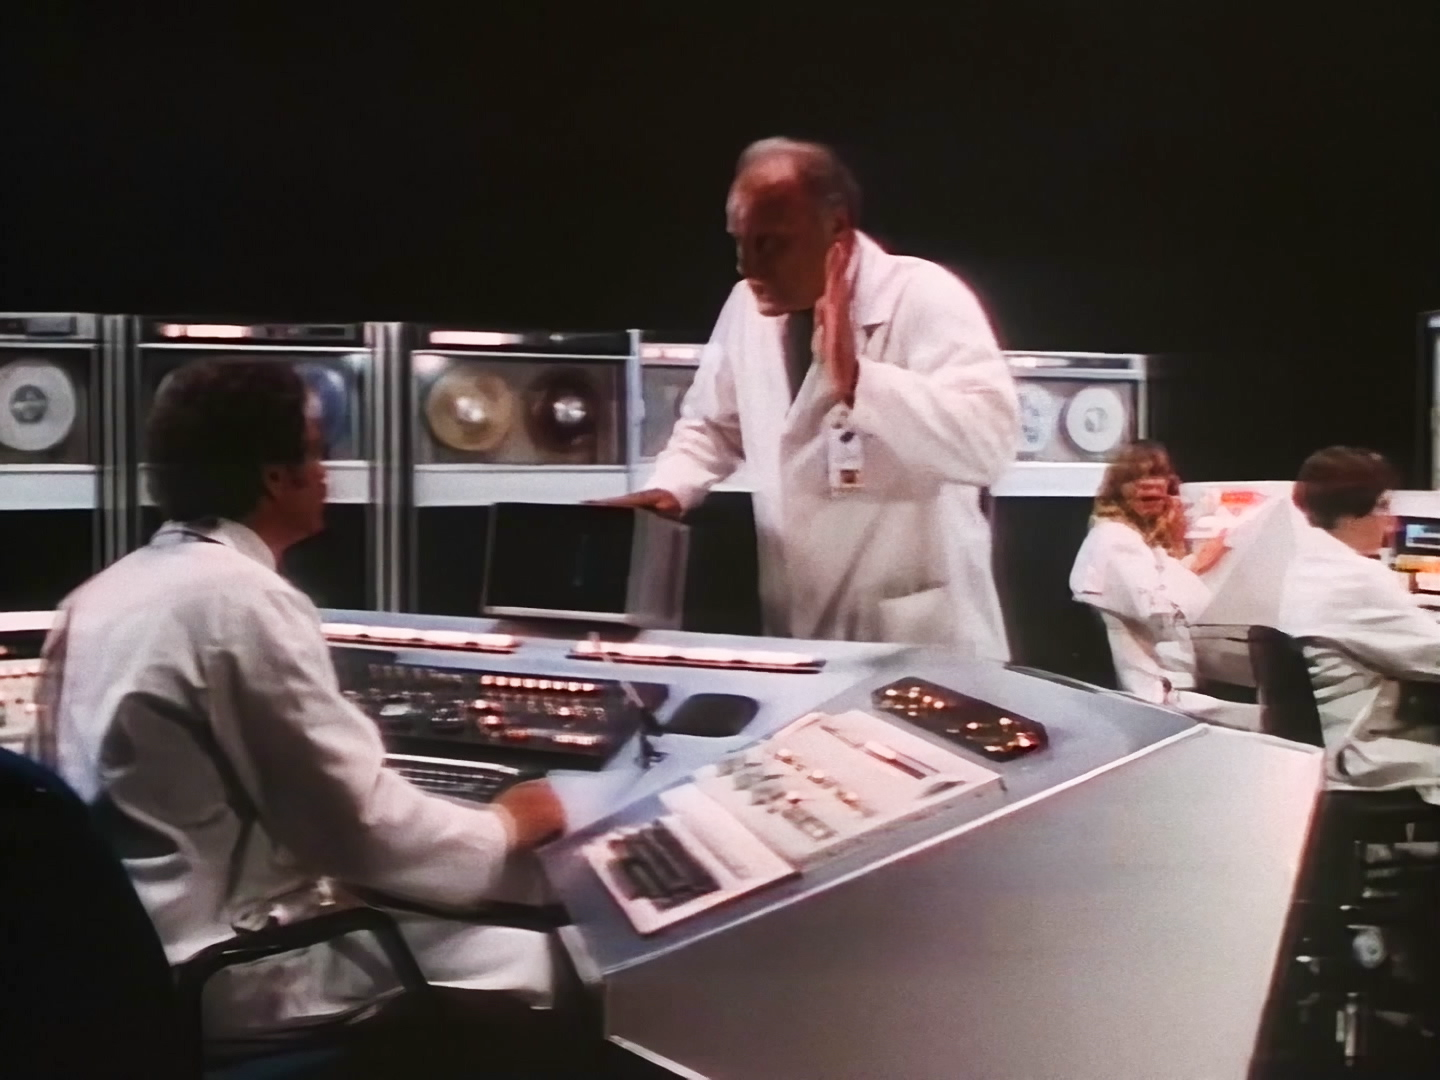
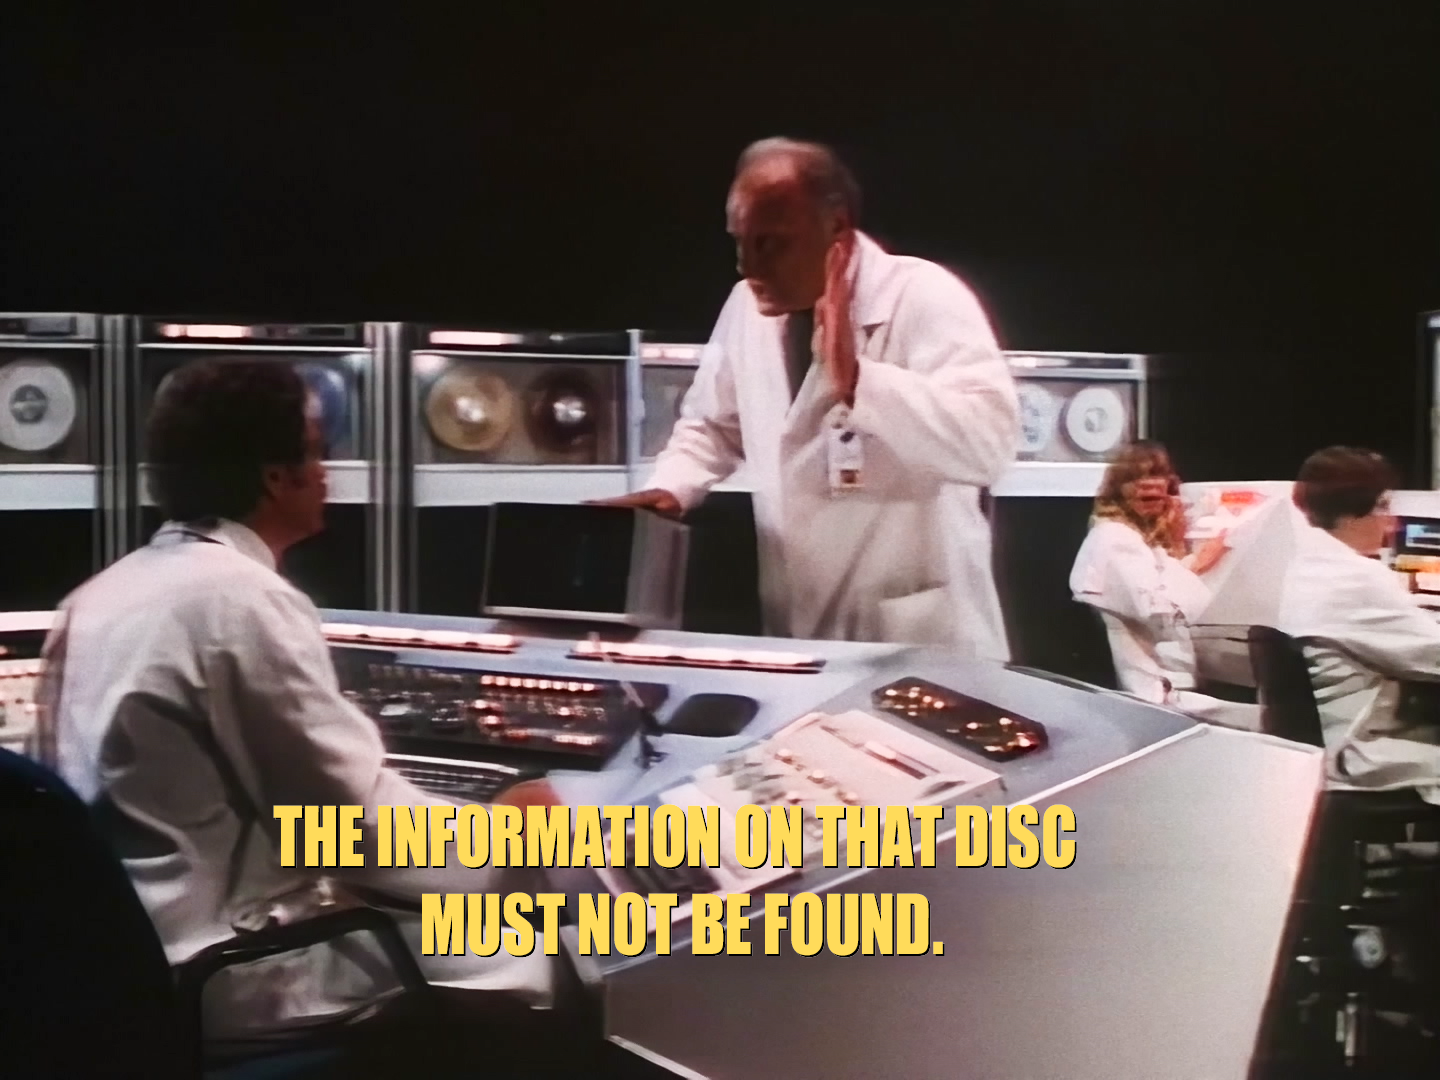
The scenes in the Russian mission control center contained hard-coded English subtitles that were in quite poor shape and needed to be replaced. However, the original subtitles were extremely difficult to remove cleanly. Digital inpainting is a tricky thing, and the success with which it can be done depends heavily on the amount of motion in the scene. When there is a decent amount of motion, there is "clean" data in other frames that the algorithm can pull from to reconstruct the inpainted area. However, when there is little or no motion, the algorithm is limited to spatial inpainting, which is not much more than a guess. The results in these situations are often about the same as you would get from using Photoshop's content-aware fill feature. Removing the English subtitles to the standard that we expect took just about every trick in our toolbox. We used a new (to us) tool called ProPainter, as well as After Effects' content-aware fill, Nuke's Copycat, and some manual cleanup of individual frames in Photoshop. Then the new subtitles were overlaid.
Lastly, new opening credits were recreated from scratch using parts of the Season 2 DVD release and then using Photoshop to recreate the graphical elements that were unique to Rescue. The opening is identical between the series and the movie right up to the point where the beached Minnow zooms in, so we can just use the DVD opening up to that point. From there on, we created a clean plate of the beached Minnow and used Photoshop to recreate graphical elements such as the ship's wheel in which the cast members appear. Similarly, for the final shot of the opening that shows the island from a distance, we can mask off the island and water and create a clean plate of the sky for a clean title. For some reason, the ocean water in this shot didn't move because the director used a still image, but we all know that the water was supposed to be animated, so we fixed that.
The credits do not use a proper font that can simply be typed in and replaced, and are instead hand-drawn graphics. This is easy to tell because there are alternate versions of the same letter, like the capital "R" below, and upon close inspection, no two letters are exactly identical. They each exhibit some degree of minor variance as a result of being hand-drawn.

That means that each letter has to be treated like any other graphic and manually traced out using the pen tool in Photoshop. This is an incredibly tedious and labor-intensive process that takes a couple of days to complete for all of the opening and post-title credits. We painted out the credits over the lagoon and created a panorama image of the huts in Photoshop that could be used as a clean plate. That allowed us to fully recreate all the opening titles in a way that's arguably even better than the original.


You can see some of the results of this work in the video below. This special edition will be available on Blu-ray and streaming soon. Check back soon for pre-order information.